Ada & SPARK VS Code Extension User’s Guide
This extension provides support for the Ada and SPARK programming languages in VS Code via the Ada Language Server based on the Libadalang library.
Features
Ada and SPARK are compiled languages which means that a compiler (GNAT) is needed to translate the source code into a program that can be executed. Other tools are also needed to perform tasks such as testing, static analysis and formal proof of SPARK code.
This extension does not include a compiler nor additional tools. Nonetheless it offers a number of features out of the box and more capabilities can be accessed by installing additional tools.
Tool |
Feature |
Support |
|---|---|---|
Ada & SPARK Extension |
||
Syntax Highlighting |
✅ |
|
Navigation |
✅ |
|
Auto-completion |
✅ |
|
Refactoring |
✅ |
|
GNAT Compiler |
||
Full Navigation |
✅ |
|
Full Auto-completion |
✅ |
|
Build |
✅ |
|
Debug |
✅ |
|
GNAT DAS |
||
Test |
✅ |
|
Code Coverage |
✅ |
|
GNAT SAS |
||
Static Analysis |
✅ |
|
SPARK |
||
Formal Proof |
✅ |
Getting Started
Here are some links that will help you get familiar with the VS Code extension for Ada & SPARK:
Environment Setup
The following environment variables influence the operation of the Ada extension:
PATHshould include the path to the GNAT compiler installation in order to benefit from auto-completion and navigation into the standard runtime. Without it, auto-completion and navigation will work only on the sources visible in the project closure, but not on the packages of the standard libraryAda.*.GPR_PROJECT_PATHprovides paths to other.gprAda projects that your project depends on.
When running VS Code locally, you can provide these environment variables by exporting them in a terminal, and starting VS Code from that same terminal with the code command.
If you are running VS Code to develop on a remote machine, please refer to the dedicated section to setup your environment properly.
Configuration
ALS settings can be specified in various ways. For example:
A
.als.jsonfile at the root of the workspace.A global user configuration file
$HOME/.config/als/config.jsonThe
.vscode/settings.jsonVS Code workspace settings file.The User or Remote or other VS Code scopes of of settings
The .als.json file is the preferred method of defining workspace-specific settings because it applies in any IDE or editor that uses ALS. More information about configuration files can be found here.
Here is an example config file that sets the project file to use and the scenario variables, as well as other useful settings (charset, whether we should show file diagnostics etc.):
{
   "projectFile": "gnatcov.gpr",
   "scenarioVariables": {
      "BINUTILS_BUILD_DIR": "/null",
      "BINUTILS_SRC_DIR": "/null"
   },
   "defaultCharset": "utf-8",
   "adaFileDiagnostics": false,
   "renameInComments": false
}
Alternatively, the ALS can be configured in the VS Code settings UI or in the JSON settings files. For example:
{
   "ada.projectFile": "gnatcov.gpr",
   "ada.scenarioVariables": {
      "BINUTILS_BUILD_DIR": "/null",
      "BINUTILS_SRC_DIR": "/null"
   },
   "ada.defaultCharset": "utf-8",
   "ada.adaFileDiagnostics": false,
   "ada.renameInComments": false
}
VS Code Remote
The Ada extension can be used on a remote workspace over SSH thanks to the Visual Studio Code Remote - SSH extension, however there are known pitfalls regarding the environment setup.
The recommended method for environment setup in a remote configuration is to set the terminal.integrated.env.* settings. You can set environment variables through the VS Code Workspace or User setting terminal.integrated.env.[linux|windows|osx] depending on your platform.
For example:
{
  "terminal.integrated.env.linux": {
    "PATH": "/path/to/my/gnat/installation/bin:${env:PATH}",
    "GPR_PROJECT_PATH": "/path/to/some-lib-1:/path/to/some-lib-2"
  }
}
Note that after changing this VS Code setting, the extension will display a popup asking you to reload the current window to take the environment changes into account. You can still run the Developer: Reload Window command manually to apply the changes later on.
In addition to Workspace and User settings, the Remote settings file can also be used to set the terminal.integrated.env.* settings, with standard precedence rules applying between the different setting scopes.
With this method, changes to the environment can be applied simply with the Developer: Reload Window command.
Another method for environment setup is possible.
According to VS Code documentation the environment of the remote extension host is based on the default shell configuration scripts such as ~/.bashrc so it is possible to provide your toolchain and project environment setup in your default shell configuration script.
However to make changes to that environment the typical Developer: Reload Window command is not enough and it is necessary to fully restart the VS Code server.
To do that you must close all VS Code Remote windows, and kill all VS Code server processes on the server (e.g. killall node if no other node processes are used on the server).
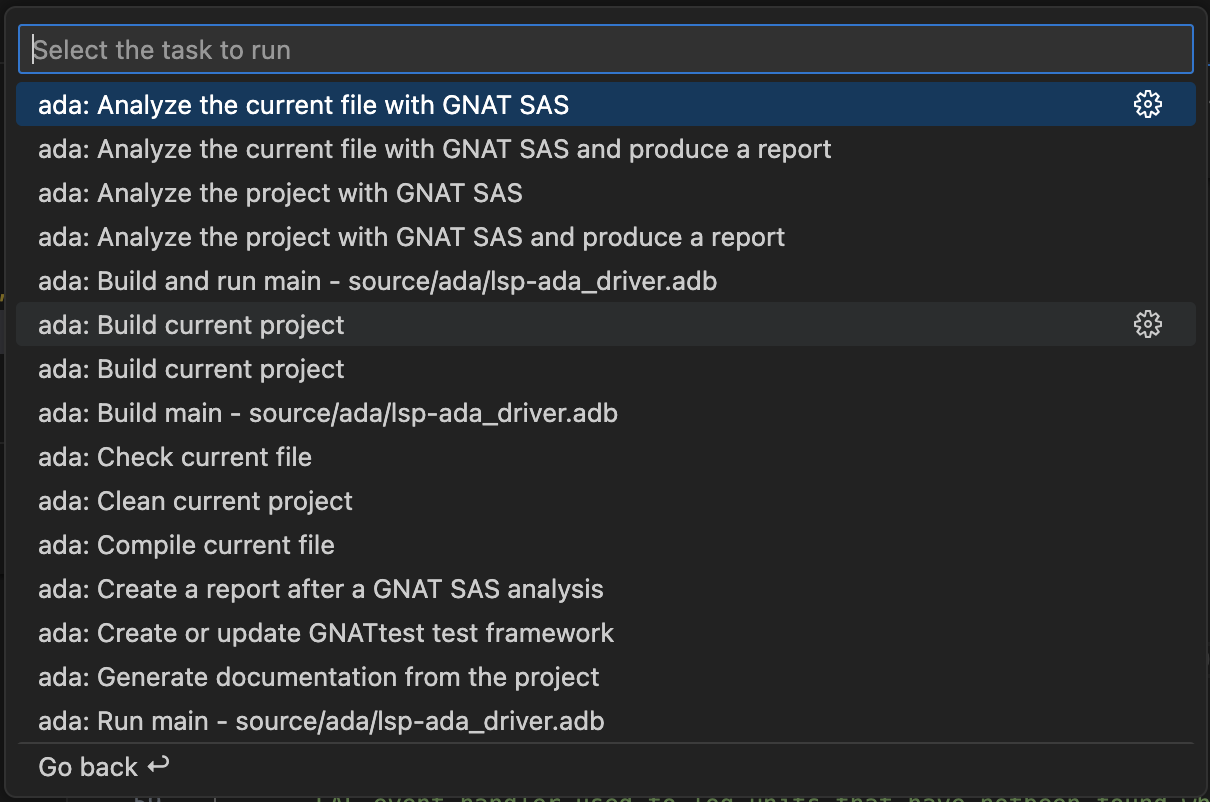
Tasks
The extension provides a number of auto-detected tasks under the /Terminal/Run Task... menu. These
predefined tasks are all prefixed by ada: and belong to the ada group.
They can be used to build and run your program (ada: Build current project task) or launch external tools such as GNAT SAS, GNATprove and a few others.
You can bind keyboard shortcuts to them by adding to the keybindings.json file:
{
  "key": "alt+v",
  "command": "workbench.action.tasks.runTask",
  "args": "ada: Check current file",
  "when": "editorLangId == ada"
}
Task Customization
You can customize auto-detected tasks
by providing extra tool command line options via the args property of the object in the tasks.json:
{
   "version": "2.0.0",
   "tasks": [
      {
         "type": "ada",
         "command": "gprbuild",
         "args": [
            "${command:ada.gprProjectArgs}",
            "-cargs:ada",
            "-gnatef",
            "-gargs",
            "-vh"
         ],
         "problemMatcher": ["$ada-error", "$ada-warning", "$ada-info"],
         "group": "build",
         "label": "ada: Build current project"
      }
   ]
}
You can also customize the working directory of the task or the environment variables via the options property:
{
   "version": "2.0.0",
   "tasks": [
      {
         "type": "ada",
         "command": "gprbuild",
         "args": [
            "${command:ada.gprProjectArgs}",
            "-cargs:ada",
            "-gnatef"
         ],
         "options": {
            "cwd": "${workspaceFolder}/my/subdir",
            "env": {
               "MY_ENV_VAR": "value"
            }
         },
         "problemMatcher": ["$ada-error", "$ada-warning", "$ada-info"],
         "group": "build",
         "label": "ada: Build current project"
      }
   ]
}
Tasks for Project Mains
If your GPR project defines main programs via the project attribute Main, additional tasks are automatically provided for each defined main.
For example, if the project defines a main1.adb and main2.adb located under the src/ source directory, two different tasks will be available to build a given main:
ada: Build main - src/main1.adbada: Run main - src/main1.adb
Same thing for all the predefined tasks that can have a main specified in their command line.
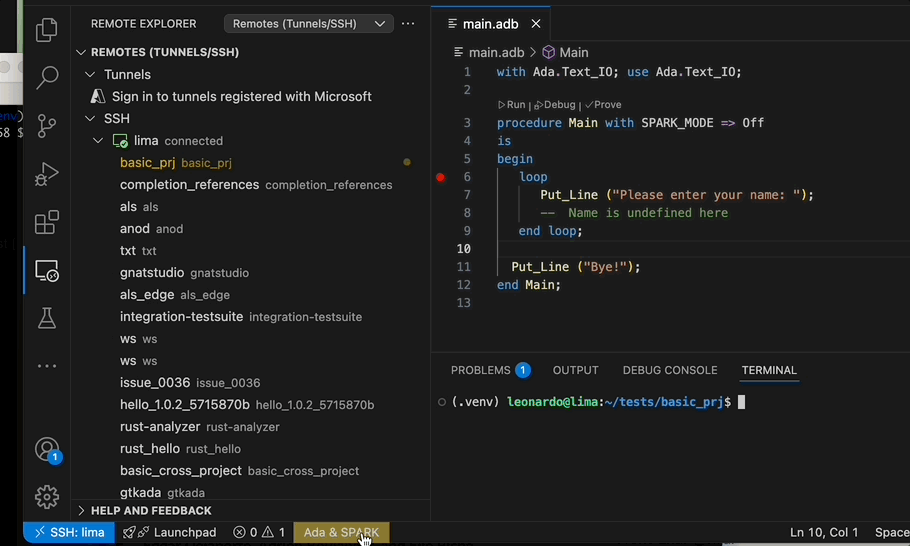
Status Bar
A status bar item displaying the project-loading status and various useful commands provided by the Ada & SPARK extension (e.g Ada: Reload Project to reload a project after modifying it) is displayed on the left-side of the VS Code Status Bar.
Alire Support
When the workspace is an Alire crate (i.e. it contains an alire.toml file), the extension uses Alire to determine the GPR project that should be loaded and to obtain an environment where the crate’s dependencies have been provisioned.
Moreover when working with an Alire crate, VS Code tasks automatically use standard Alire commands. For example, the ada: Build current project task uses the command alr build and the ada: Clean current project task uses the command alr clean.
All other tasks use alr exec -- ... to execute the command in the environment provided by Alire.
GNATtest Support
If you install GNATtest, the Ada & SPARK extension for VS Code will provide the following functionalities:
The task
ada: Create or update GNATtest test frameworkwill callgnattestto create a test harness and test skeletons for your project automatically. You can use standard VS Code task customization to configure command line arguments to your liking in atasks.jsonfile.Once the test harness project is created, the task
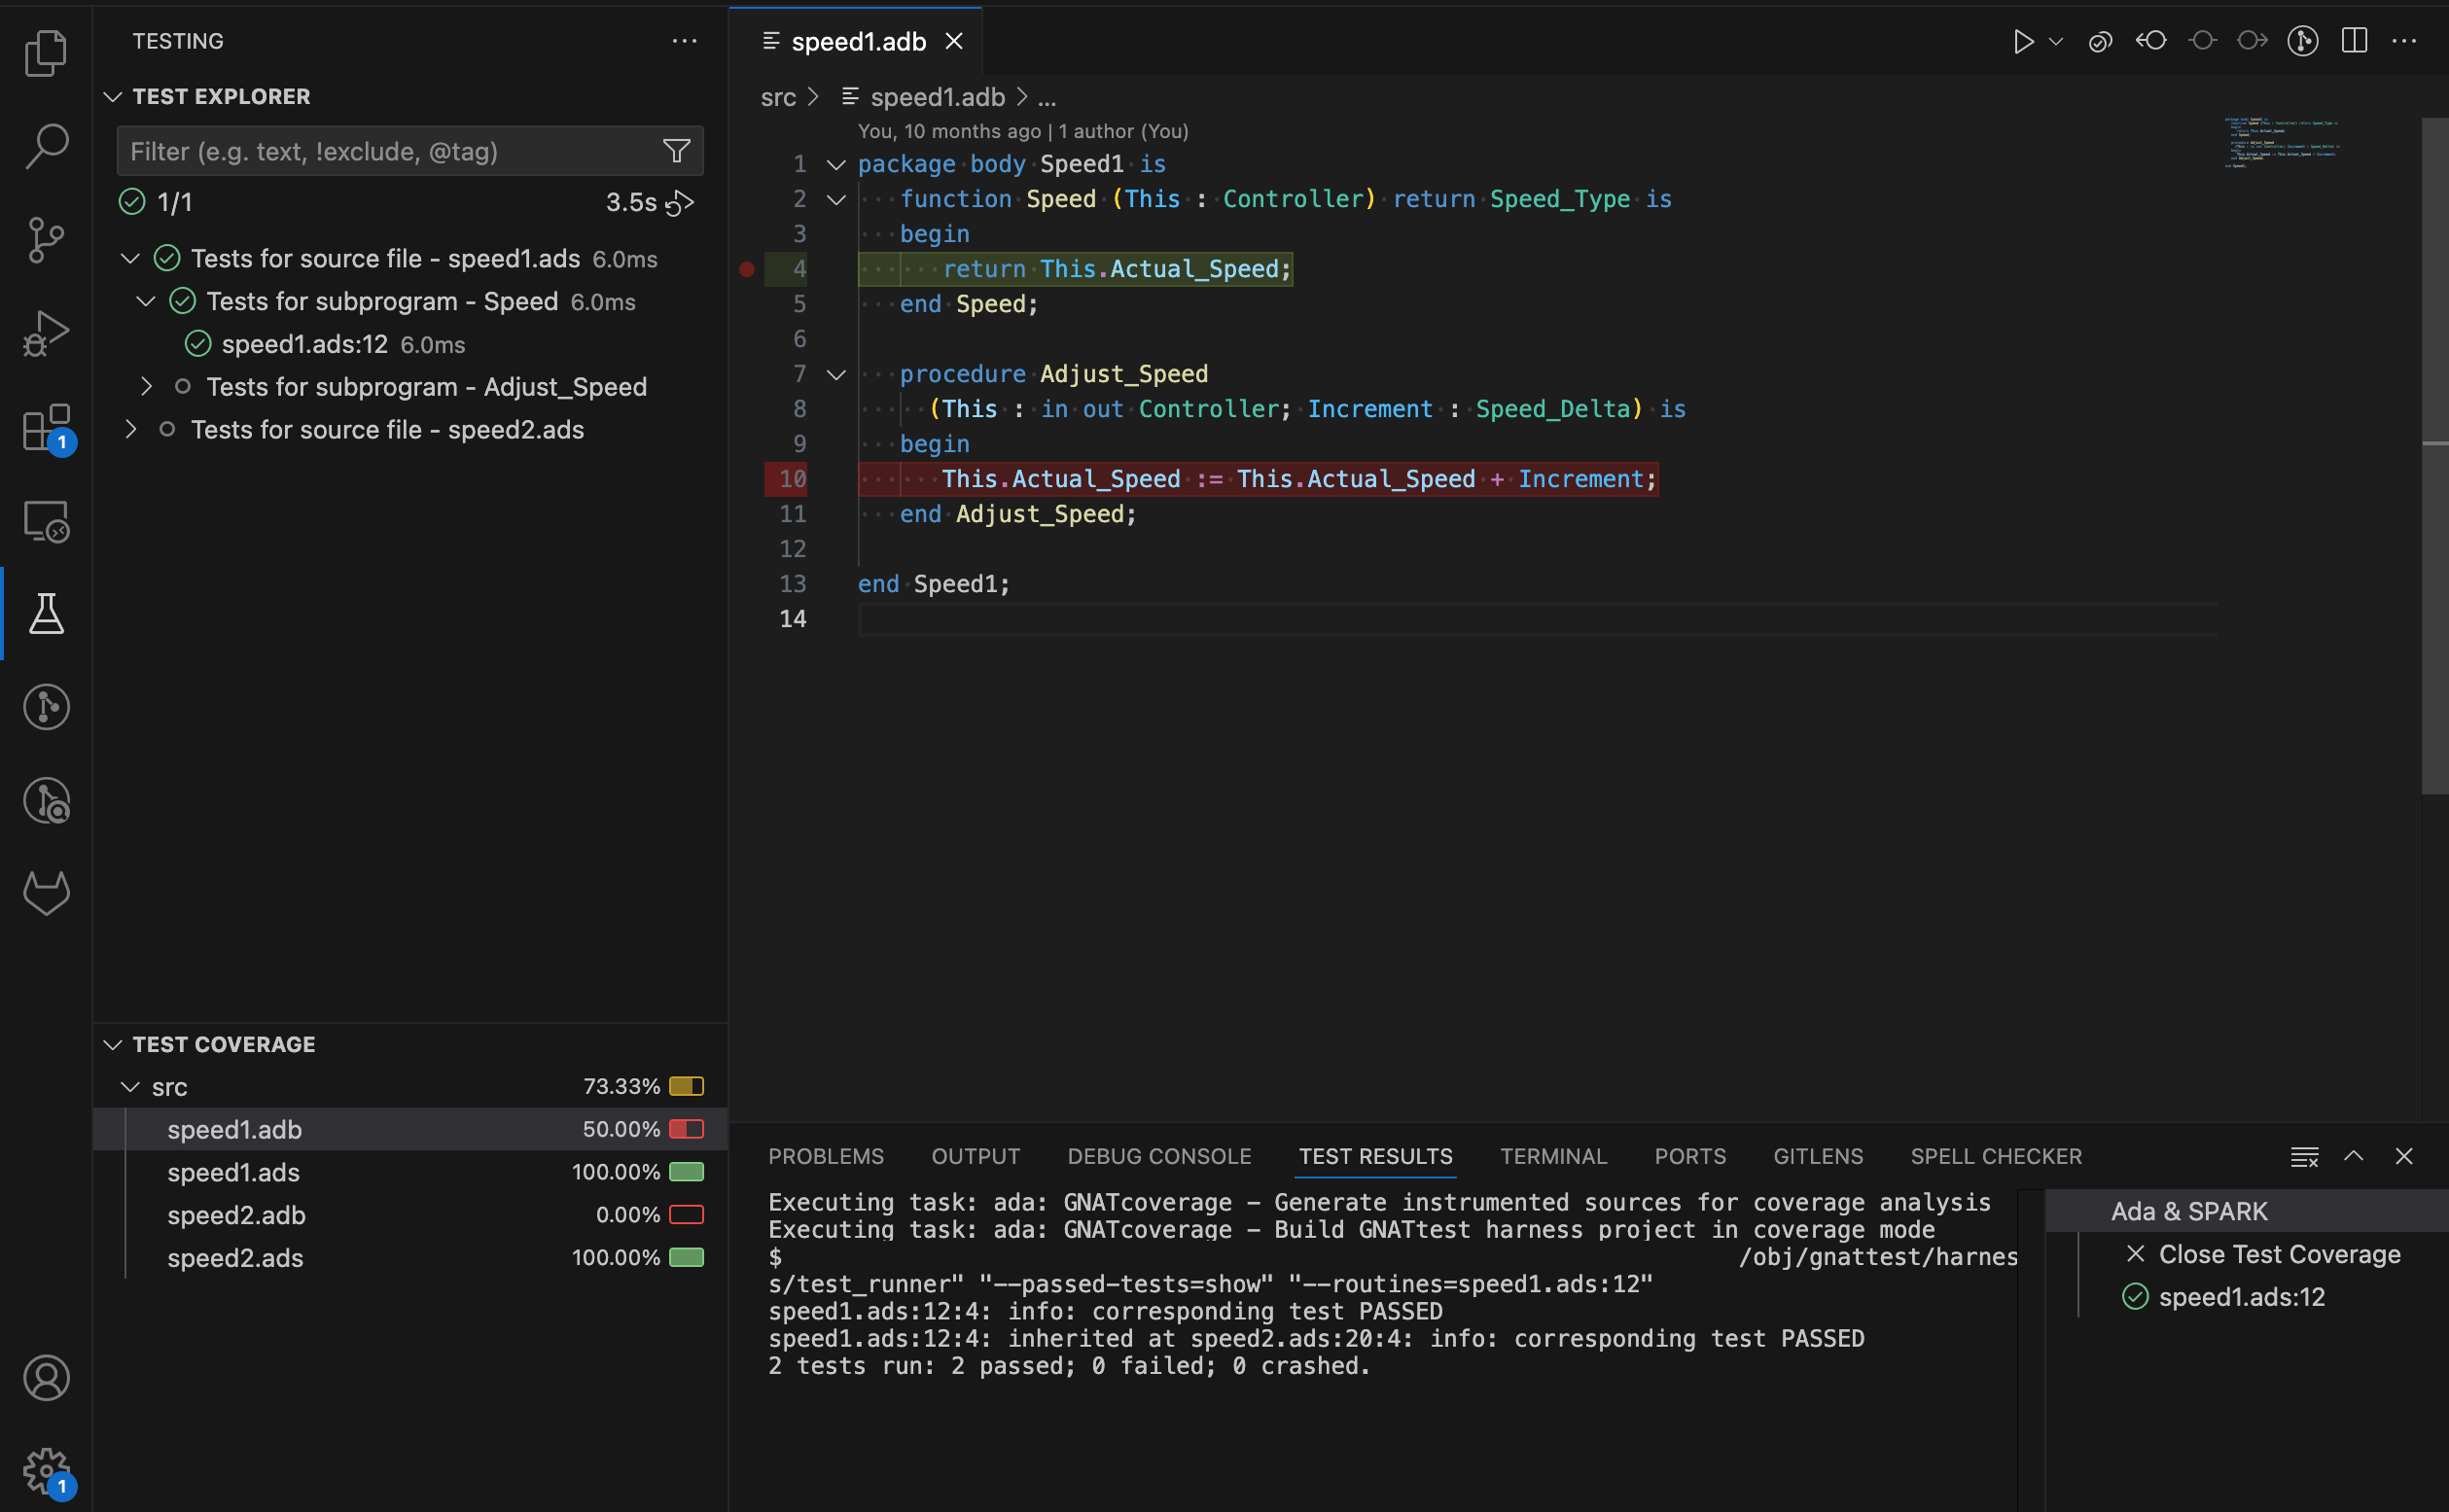
ada: Build GNATtest test harness projectis provided automatically for building it. Command line arguments can be customized by configuring the task in atasks.jsonfile.Tests created with GNATtest will be loaded in the VS Code Testing view as follows.
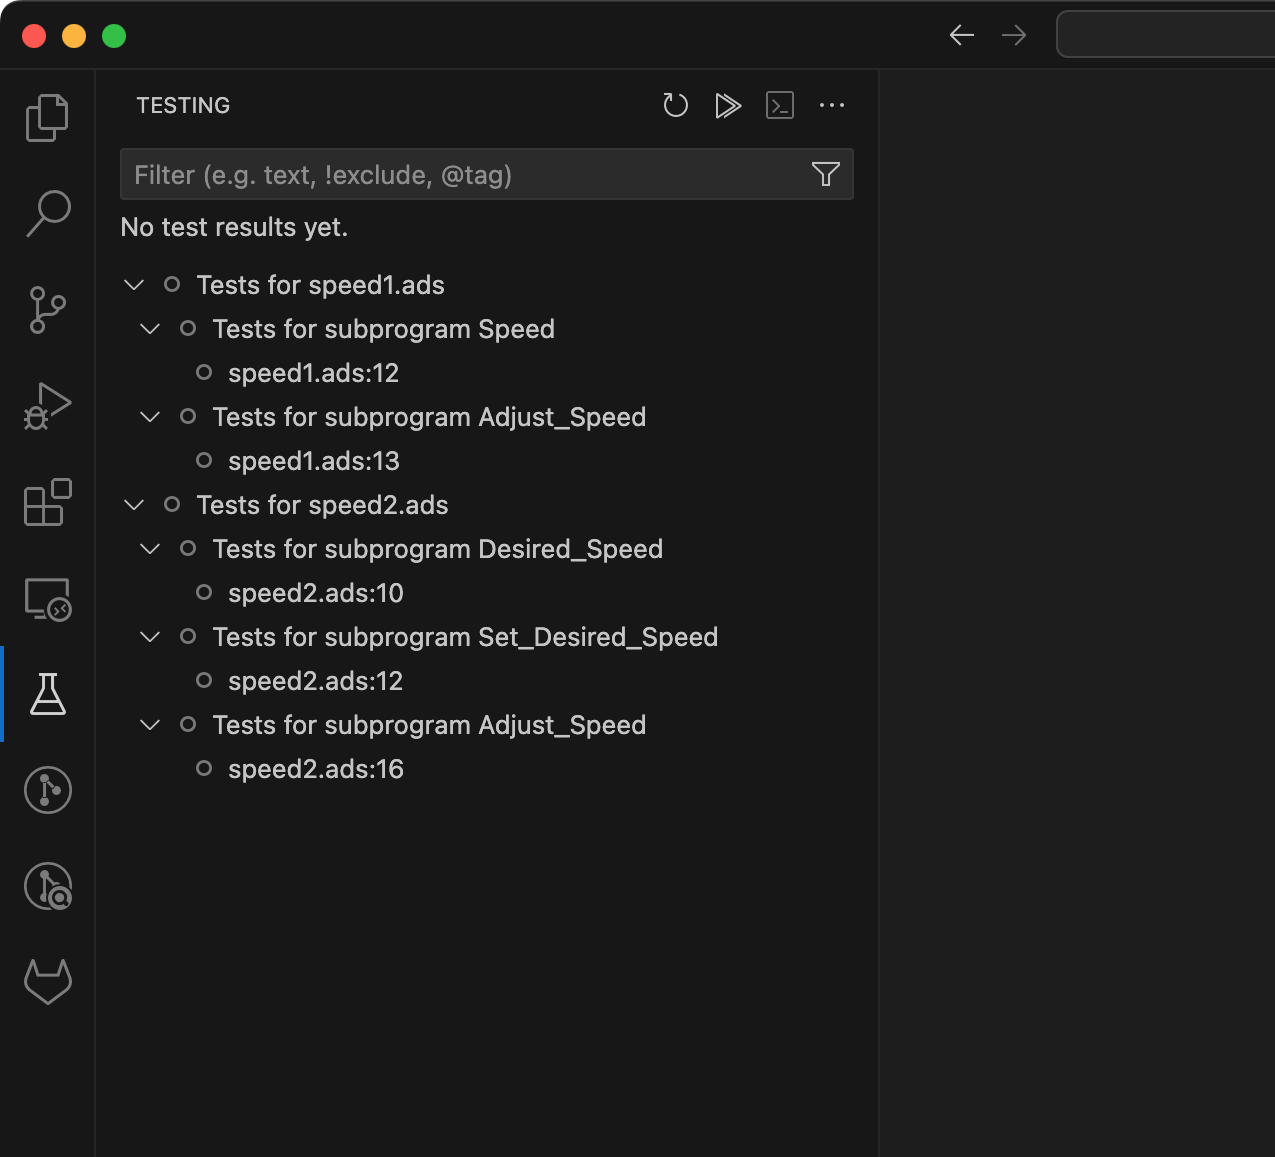
Tests can be executed individually or in batch through the available buttons in the interface, or through the
Test: Run All Testscommand or related commands.Test execution always starts by executing the
ada: Build GNATtest test harness projecttask to make sure that test executables are up to date.Test execution results are reflected in the test tree.

Using multi-root workspaces for test development
When developing tests, it is recommended to use the test harness project auto-generated by GNATtest.
You can do so by editing the ada.projectFile setting to point to the test harness project.
However to avoid switching back and forth between the main application project and the test harness project,
see Working with Multiple Projects in the Same VS Code Workspace for instructions on opening the test harness project in a separate VS Code window.
Limitations
If you use a separate window to load the test harness project and edit tests, you have to go back to the main application project to benefit from the integration with the Test Explorer view (e.g. listing and searching for tests, running tests, etc…). This limitation is planned to be lifted.
Sections of test sources delimited by
begin read onlyandend read onlycomments are not really protected from inadvertant edits. To ensure proper interactions with GNATtest, you must refrain from making edits in those sections.
GNATcoverage Support
GNATcoverage coverage reports can be imported in VS Code as follows:
Instruct GNATcoverage to produce an XML report
Invoke the VS Code command
ada: GNATcoverage - Load an existing XML coverage reportBrowse to the location of the GNATcoverage XML report and select the
index.xmlfile
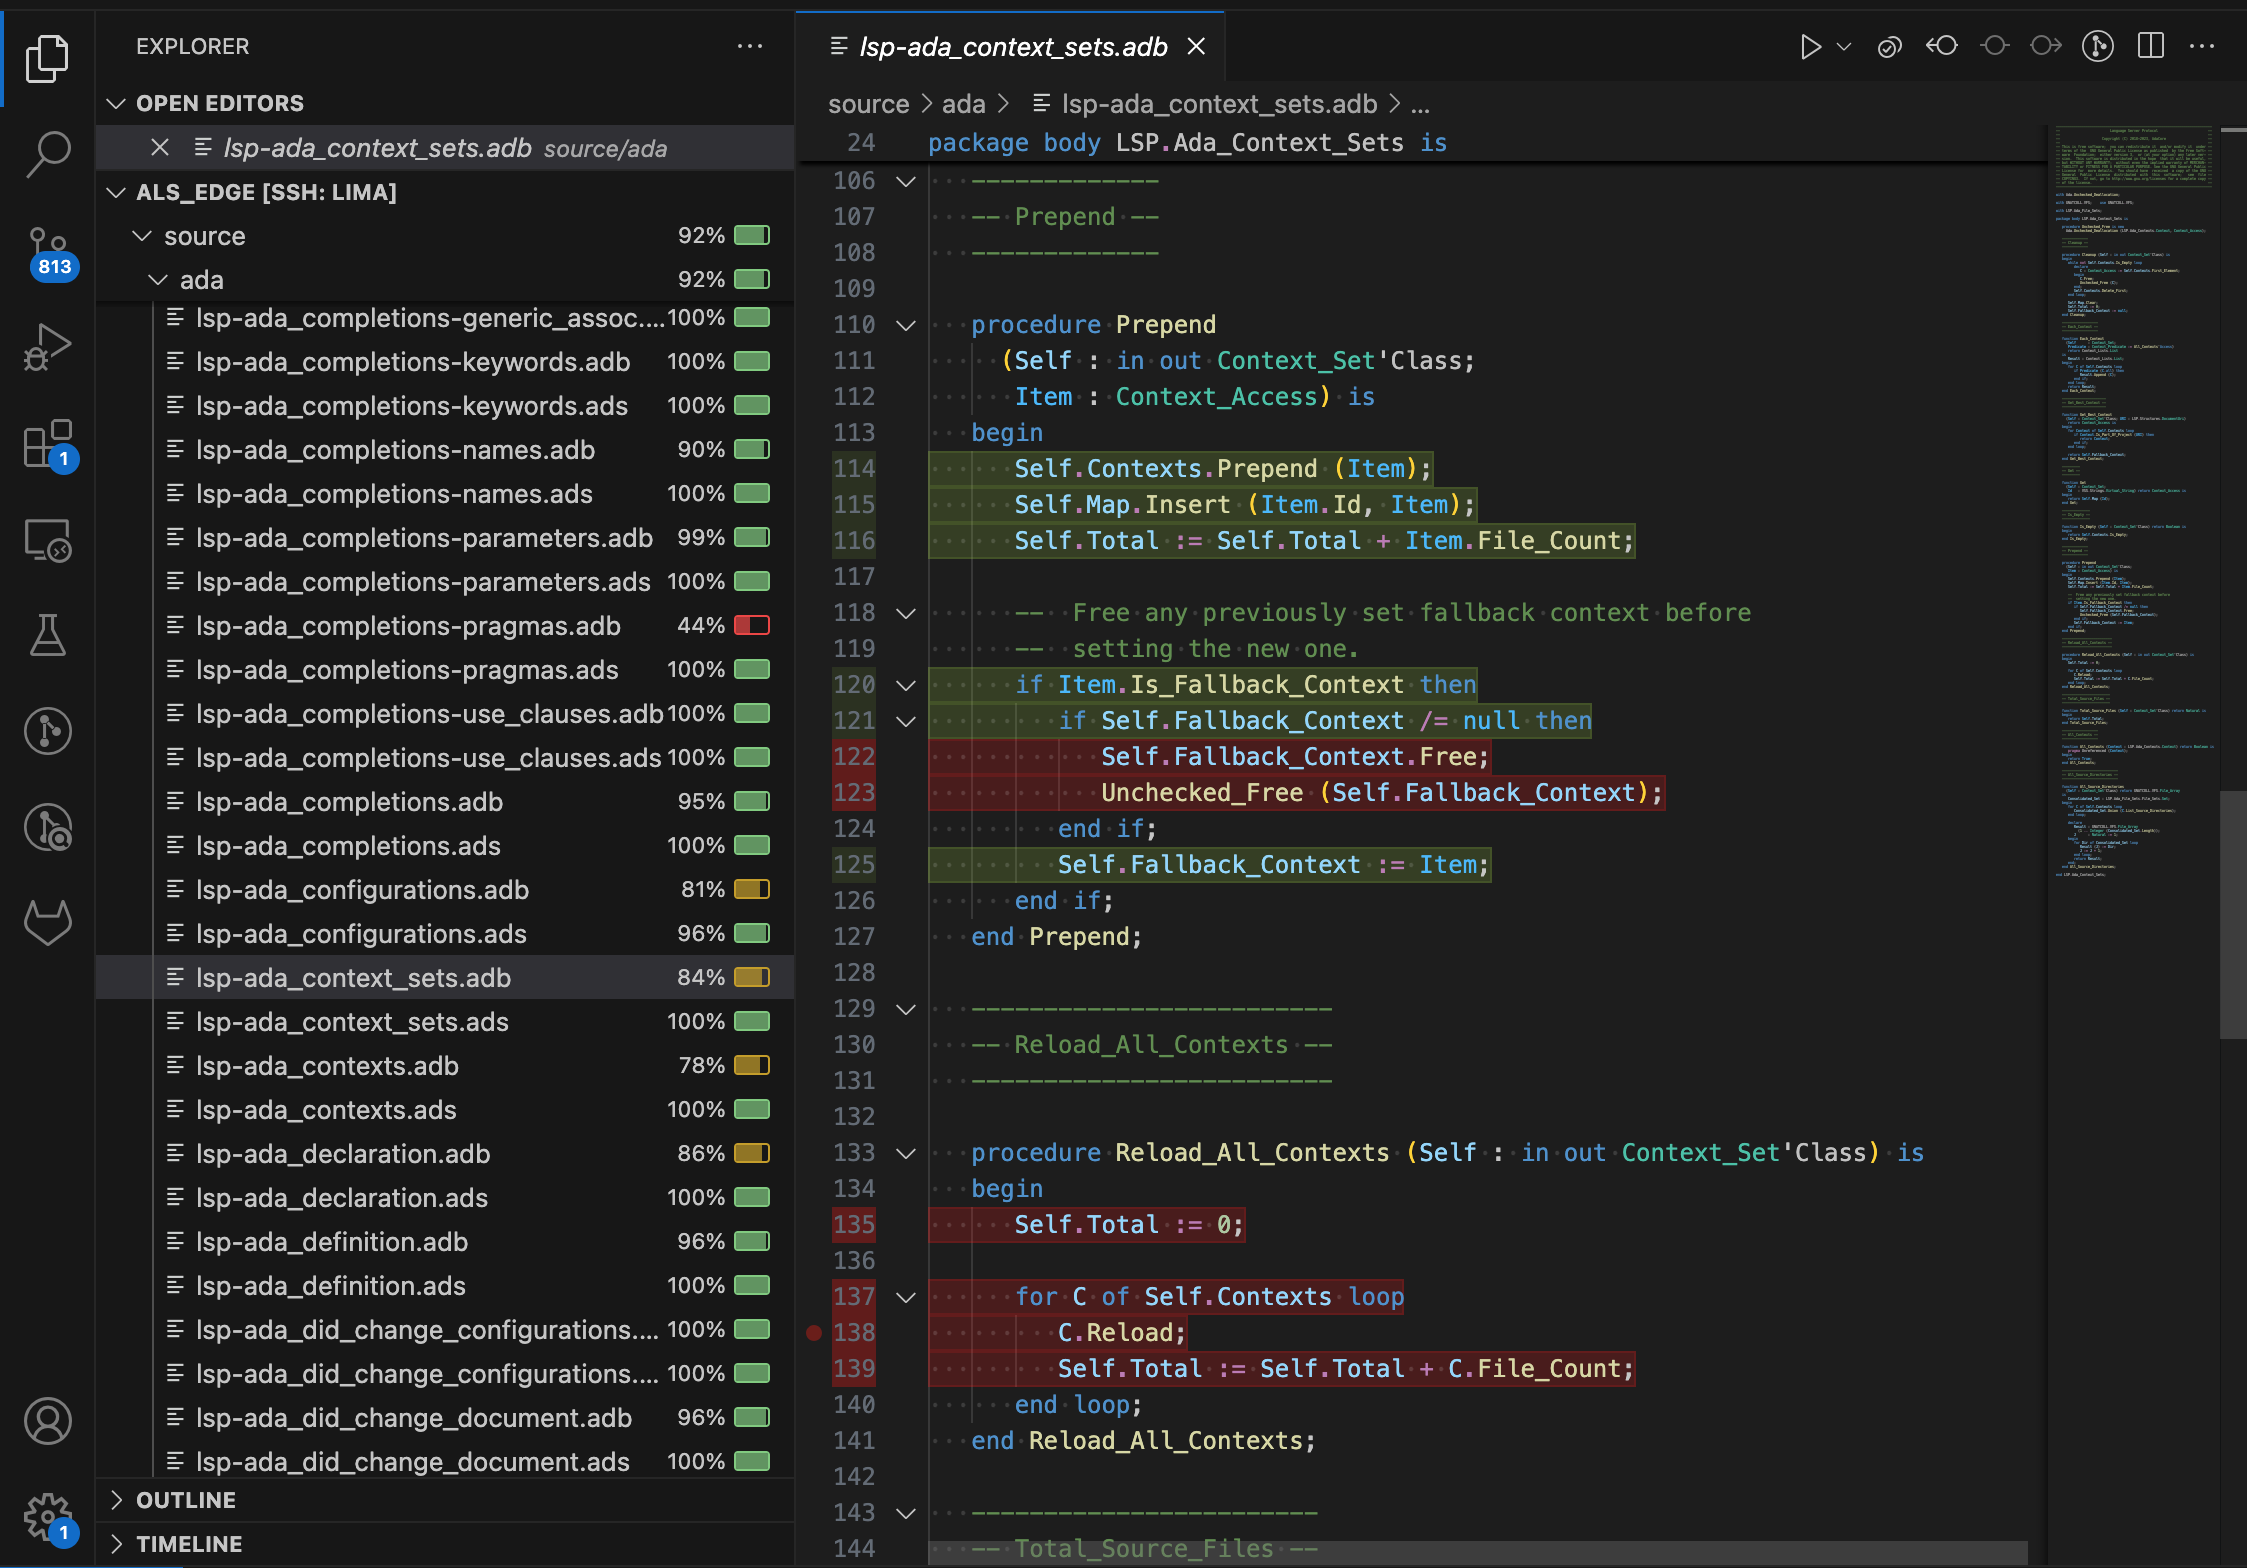
Note that importing coverage reports does not require GNATcoverage to be installed. In particular, this enables a workflow where the coverage report is produced in CI and downloaded and imported into VS Code for visualization and analysis.
Since VS Code does not support reporting MC/DC level coverage natively, that information is imported as branch coverage.
The GNATtest integration in VS Code also supports running tests in coverage mode, if GNATcoverage is installed on the development machine.
Run the task
ada: GNATcoverage - Setup runtime libraryonce to set up the GNATcoverage runtime libraryIf you don’t already have a test harness project created, use the task
ada: Create or update GNATtest test frameworkto create oneSwitch to the Test Explorer view or use the
Testing: Focus on Test Explorer Viewcommand to do thatRun the tests in coverage mode using the command
Test: Run All Tests with Coverage, or use the “play” icon next to a single test or group of tests with the label Run Test with Coverage.In one go, VS Code will:
Build the test harness project
Run the tests
Load the GNATcoverage report into VS Code
Integrating the steps of source instrumentation and test harness build into the test execution workflow allows for a quick feedback loop: run a test, observe results and coverage, edit the test or the tested code, repeat… In this context invoking the VS Code commands Test: Rerun Last Run and Test: Rerun Last Run with Coverage with their respective keyboard shortcuts can be valuable.
Cross and Embedded Support
This section provides some guidance to work on cross or embedded projects. It assumes
that your .gpr project files are already properly configured to work on a cross environments/embedded platforms.
GNATemulator Support
If you have loaded an embedded project, the extension will automatically provide predefined tasks and commands to run and debug your application through GNATemulator, if available for your target.
For instance if you have loaded a project with an arm-eabi target configured to run on a STM32F4
board, the extension will provide predefined tasks, commands and CodeLenses to run and debug your
program using GNATemulator.

The port used by the debugger launched by VS Code to connect to the running GNATemulator instance
is the one specified via the Emulator'Debug_Port project attribute: when not set, the extension
will fallback on localhost:1234 (GNATemulator’s default debug port).
Note that GNATemulator is not available for all GNAT embedded toolchains. For more information about GNATemulator itself and its availabilty please refer to the GNATemulator User’s Guide.
Remote Debugging
If your project can be debugged remotely via GDB using the target remote <ip-of-target:port> command, you will just need to set the IDE'Program_Host project attribute in your .gpr file to specify the address that should be used
to connect to your machine or board.
You will also need to run the debugging utility that spawns the remote gdbserver before launching the debugger in VS Code ( e.g: st-util or openocd for STM32F4 boards). This can be done directly through a VS Code Terminal or by configuring a custom VS Code task for that purpose.
Once your project is setup, just open the VS Code
Run and Debug panel and then click on the Run and Debug button.
For more advanced use cases or if your program cannot be debugged remotely via GDB, you can try creating your custom VS Code debug launch configuration following VS Code User’s Guide for Launch Configurations.
Working with Multiple Projects in the Same VS Code Workspace
It is a possible for a workspace to contain multiple GPR projects.
For example, this is a typical scenario when working with GNATtest which generates (potentially multiple) test harness projects that contain test and stub sources that interface with the application code.
However, only one project can be loaded at a time with the ada.projectFile setting.
So you may find yourself switching back and forth between projects which can quickly become cumbersome.
This situation can be improved with VS Code multi-root workspaces. For example, in a workspace containing prj1.gpr and prj2.gpr it is possible to define the following two multi-root workspace files:
prj1.code-workspace{ "folders": [ { "path": "." } ], "settings": { "ada.projectFile": "prj1.gpr" } }
prj2.code-workspace{ "folders": [ { "path": "." } ], "settings": { "ada.projectFile": "prj2.gpr" } }
(while the name indicates multi-root, we are using a single root folder in each workspace)
Each of these workspaces can be opened in a different VS Code window, allowing to work on both projects side by side.
Alternatively, the root workspace materialized by .vscode/settings.json can be kept as the main workspace with prj1.gpr, and the other multi-root workspace is created as prj2.code-workspace for working with prj2.gpr.
In the use case of GNATtest, this allows us to load the main application project in a window and the test harness project in another window, and work on both simultaneously.
Note that a separate Ada Language Server instance is used for each VS Code window, so you might observe high memory consumption in this situation.
Commands and Shortcuts
The extension contributes commands and a few default key bindings.
Below are a few examples, and other commands can be found by searching for Ada: in the command list.
Ada: Go to other file
This command switches between specification and implementation Ada files.
The default shortcut is Alt+O.
Ada: Add subprogram box
This command inserts a comment box before the current subprogram body.
The default shortcut is Alt+Shift+B.
Ada: Reload project
This command reloads the current project.
The default shortcut is None.
Tasks with keyboard shortcuts
The following default shortcuts are provided for tasks:
Task |
Shortcut |
|---|---|
|
|
|
|
|
|
|
|
Meta = ⌘ on macOS, Win on Windows, Meta on Linux
These shortcuts can be customized and new shortcuts can be added for other tasks by using the command Preferences: Open Keyboard Shortcuts (JSON) and adding entries like the following example:
{
    "command": "workbench.action.tasks.runTask",
    "args": "ada: Check current file",
    "key": "meta+y meta+c",
    "when": "editorLangId == ada && editorTextFocus"
}
macOS and Apple Silicon
On macOS with Apple silicon it is possible to use either the native aarch64 version of the GNAT compiler or the x86_64 version running seamlessly with Rosetta.
If you are using the aarch64 version, as this is still a relatively new platform for Ada tools, it is necessary to set the following attribute in your main project file to obtain navigation and auto-completion functionalities on the standard runtime:
for Target use "aarch64-darwin";
If you encounter issues with the compiler on macOS, it is recommended to consult known issues at Simon Wright’s GitHub project and discussions on the comp.lang.ada group.
Bug Reporting
You can use the VS Code Issue Reporter to report issues. Just click on the Help -> Report Issue menu, select An extension for the File on entry and Language Support for Ada for the extension name. Put as many information you can in the description, like steps to reproduce, stacktraces or system information (VS Code automatically includes it by default). This will create a GitHub issue in the Ada Language Server repository.
ALS log files can be found under the ~/.als directory (%USERPROFILE%/.als on Windows). Feel free to attach them on the issues, it helps a lot for further investigation, specially when the ALS.IN and ALS.OUT traces are enabled (more info about traces configuration can be found here.)
Limitations and Differences with GNAT Studio
The VS Code extension has a few limitations and some differences compared to GNAT Studio:
Indentation/formatting: it does not support automatic indentation when adding a newline and range/document formatting might no succeed on incomplete/illegal code.
Tooling support: we currently provide support for some SPARK, GNATtest, GNATcoverage, GNAT SAS and GNATemulator Tasks, but some workflows may not be supported yet.
Alire support: if the root folder contains an
alire.tomlfile and there isalrexecutable in thePATH, then the language server fetches the project’s search path, environment variables and the project’s file name from the crate description. Tasks are also automatically invoked with Alire in this case.Project support: there is no
Scenarioview: users should configure scenarios via the _ada.scenarioVariables* setting (see the settings list available here). Saving the settings file after changing the values will automatically reload the project and update the predefined tasks to take into account the new scenario values.Source directories from imported projects should be added in a workspace file. If you already have a workspace file, the extension will propose you to automatically add all the source directories coming from imported projects to your workspace automatically at startup.